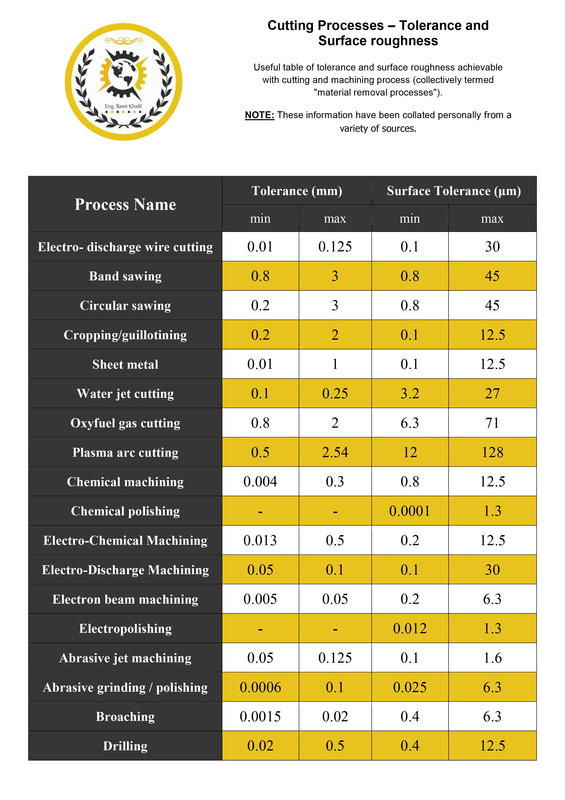
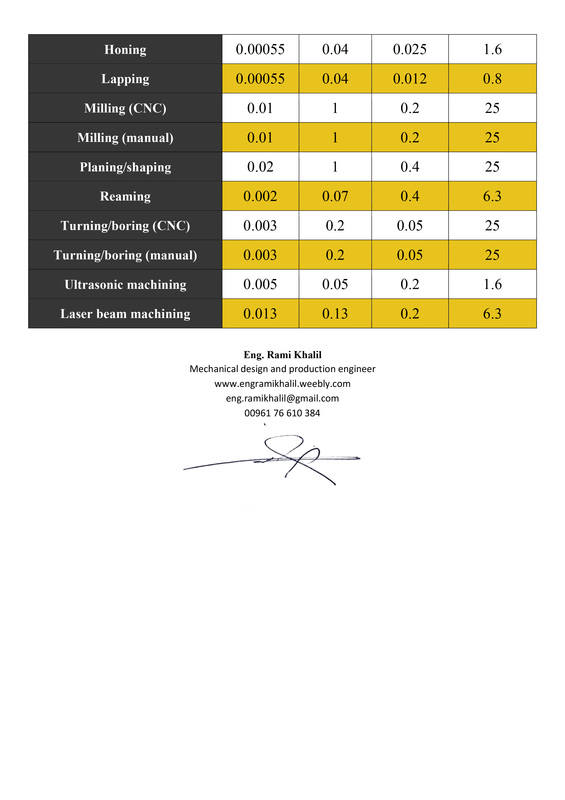
This table contains the obtained values of machining tolerance and surface roughness according to the machining or cutting process, these process collectively termed as "material removal processes".
The process (table order):
1- Electro-Discharge Wire Cutting.
2- Band Sawing.
3- Circular Sawing.
4- Cropping / Guillotining.
5- Sheet Metal.
6- Water Jet Cutting.
7- Oxyfuel Gas Cutting.
8- Plasma Arc Cutting.
9- Chemical Machining.
10- Chemical Polishing.
11- Electro-Chemical Machining.
12- Electro-Discharge Machining.
13- Electron Beam Machining.
14- Electropolishing.
15- Abrasive Jet Machining.
16- Abrasive Grinding / Polishing.
17- Broaching.
18- Drilling.
19- Honing.
20- Lapping.
21- Millimg (CNC).
22- Milling (Manual).
23- Planing / Shaping.
24- Reaming.
25- Turning / Boring (CNC).
26- Turning / Boring (Manual).
27- Ultrasonic Machining.
28- Laser Beam Machining.


 RSS Feed